|
Musical
Robot
|
|
<Toypi>
a robotic toy piano Godfried-Willem RAES 2008 |
|
Musical
Robot
|
|
<Toypi>
a robotic toy piano Godfried-Willem RAES 2008 |
<Toypi>
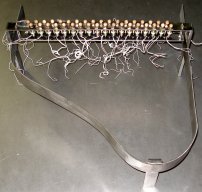
Definitely, I am not the first designer to build an automated toy piano. My friend and colleage Trimpin has -as far as I know- been the first to deliver a good working programmable acoustic toy piano. Our own design presented here, however started completely from scratch. First we removed and saved the internal harp (clamped rods mounted on a cast iron bar) from a 35 note chromatic toy piano made by Antonelli (Italy). We designed a completely new soundboard, replacing the original plastic construction. The new soundboard was made from hardened brass, the same type as we used before in <aeio>, our robotic cello. In contrast to the robotic cello design however, here we did not clamp the soundboard on its circumference, but we mounted it free swinging, using elastic material for mounting in the piano chassis. This lowers the resonant frequency for the mimimal surface dictated by the design here. The soundboard operates more or less as a Chladni plate. It also contributes greatly to the damping of mechanical noises. To preserve the typical sound, we kept the original design for the small wooden hammers. The keywork was completely replaced by a tubular solenoid assembly, controlled by a couple of PIC microprocessors. The maximum sound volume of the instrument is pretty limited. We could not change this, since sound volume is inherently connected to the sizing of the rod assembly. Louder sound would dictate thicker as well as longer rods. As to the electronic hardware, we used the same printed circuit boards here as developed earlier for <Xy>, our robotic quartertone xylophone. The boards were mounted at the spot where you would normally expect the keyboard. The power supplies found a place under the soundboard. The general shape of the instruments chassis follows closely the typical shape of a normal grand piano, although in this case, it was made entirelly using welded stainles steel. It stands on three sturdy legs. The instrument listens to midi commands and very precise velocity control is implemented.
The acoustics of toy piano's are quite a complicated thing to approach mathematically. The acoustic laws to calculate the fundamental frequency of a rod clamped at one end only apply in part. As one applies the usual formula for the fundamental frequency f = k ./ (l^2) you will always get very low frequencies, apparently unrelated to what you hear as a result [1]. This is because the apparent perceived pitch corresponds in fact to one of the very inharmonic upper partials of this fundamental. After the literature the partial series goes like this: f , 6.267 f, 17.55 f, 34.39 f etc... This explains why it is even for well trained musical ears, quite difficult to judge the pitch unambiguously and it certainly explains why it is pretty impossible to build a toy piano with a consistent ambitus of say larger than three octaves.
At first sight, it may appear to be a bit silly to spend all the effort and money to automate such a cheap instrument as the toy piano. The building costs are about a hundreth times the cost of the toy piano itself. But at the other end, there appears to be quite some serious music literature for the toy piano... Margareth Leng Tan even devotes a large part of her career to concerts on this instrument! After all, one must confess its sound is quite unique. Realizing this, it is obvious that the toy piano is quite clumsy to play professionally: not only the keys are undersized for normal hands, but also the mechanics are pretty unreliable. By making a robot player toypiano, it becomes possible to play the toy piano via the interface of a normal touch sensitive keyboard, a hitherto unimaginable possibility. Of course, <Toypi> can also be completely computer controlled and used in interactive applications. As an alternative to MIDI control, we also implemented UDP/IP control.
A series of pictures shot during the construction (in chronological building order):
 |
 |
 |
 |
 |
 |
 |
 |
 |
 |
 |
 |
Download high resolution picture
Power supply voltages and currents:
Midi Mapping and implementation:
Midi channel : 10 (0-15).
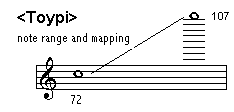
Midi note range: 72-107. Note on, velocity is implemented and has a wide control
range.

Note Off commands are not required, but can be sent with no effect.
There is an intrinsic relation between the applied velocities and the maximum note repetition rate. The table below clarifies this:
| velocity patch 0 |
repetition rate (note/second) |
remarks |
| 1 | 120 | limited only by the inertia of the mechanics |
| 2 | 120 | limited only by the inertia of the mechanics |
| 4 | 120 | limited only by the inertia of the mechanics |
| 8 | 80 | resonances with the rods can occur |
| 16 | 40 | |
| 32 | 20 | |
| 64 | 10 | |
| 127 | 5 |
Note that high repetition rates in combination with velocities higher than what's strictly required, can be detrimental to the instrument. Moreover, it sounds very bad also because the beaters will stick to the tone rods..
Lights:
Program change: implemented. Different velocity scalings are mapped on program change numbers 122 to 127.
The default scaling is obtained with program change 122. With this default scaling, the lowest velocities are only usefull for fast repetitions. For single notes the velocity should be at least 20 for the note to sound. Avoid using high velocities at high repeat rates!
Technical specifications:
Design and construction: dr.Godfried-Willem Raes
Collaborators on the construction of this robot:
Music composed for <Toypi>:
| Back to composers guide to the M&M robot orchestra. | Back to Main Logos page:index.html | To Godfried-Willem Raes personal homepage... | To Instrument catalogue |  |
<Toypi>
In het bouwen van een automatische speelgoedpiano waren we beslist niet de eerste. Mijn goede vriend en kollega robotbouwer Trimpin, was me ruim voor op dit gebied. Mijn eigen ontwerp dat we hier verder toelichten, vertrok evenwel geheel vanaf nul. We begonnen met het geheel demonteren van een 'Antonelli' drie-oktaafs speelgoedpiano. Alleen de 'harp' hielden we integraal over uit het origineel instrument. De klankkast en het chassis waren geheel uit plastic en gooiden we in de vuilnisbak. Gezien onze positieve ervaringen met gehard messing als klankbordmateriaal (cfr. <aeio>, lag het voor de hand verder te bouwen op de daarbij opgedane ervaring en dus ook hier een hard messing (MS58) klankbord te gebruiken. Deze keer evenwel geen ingeklemd klankbord, maar wel een chladni plaat met vrije en elastische ophanging. Daardoor kan de resonantietoon van het klankbord heel laag worden gehouden met minimale oppervlakte. Voor de automatisering van de hamertjes gebruikten we aanvankelijk kleine buisvormige trekmagneten voorzien van een terugkeerveer. Dat vergde evenwel nogal wat tussenmechaniek en overbrengingen met alle bijgeluiden vandien, zodat we reeds vrij vroeg in de bouw overschakelden op een aansturing via omgekeerd werkende kleine duwmagneten, voorzien van een houten slagkogelje. Een bijzonder ontwerpprobleem stelde de bijzonder kleine afstand tussen de toetsen en dus ook tussen de klankstaafjes onderling: ca. 11mm slechts. Hierdoor was het onmogelijk de vele spoelen naast elkaar op te stellen zoals nodig om de staafjes op eenzelfde plek te kunnen aanslaan en zo een voor alle tonen gelijkblijvend timbre te garanderen. De diameter van de kleinst vindbare degelijke elektromagneten is ca. 14mm, wat ons noopte tot een geschrankte opstelling. Het pianochassis volgt grotendeels het model van een grote vleugelpiano maar werd hier helemaal in gelast inox uitgevoerd. Op de plaats waar men normaal het toetsenbord zou verwachten, plaatsten we de beide mikrokontroller boards voor de automatische besturing. Voor de voeding vonden we een plaatsje onder het messing klankbord. De hele besturingselektronika kan uit het hoofdchassis gegleden worden nadat de vier M4x10 boutjes aan de onderzijde van het 'klavier' zijn losgemaakt. Net zoals bij een grote piano, steunt ook <Toypi> op drie stevige poten voorzien van (gerecikleerde) stalen wieltjes.
De stemming van speelgoedpianos is altijd een beetje een heikel punt. In het laagste oktaaf klopte de stemming van ons exemplaar vrij goed, maar in het middengebied was ze ongeveer een kwarttoon te hoog. Het bijstemmen van de staafjes is een vrij riskante onderneming, hoewel het principe erg eenvoudig is: om de toon te verhogen moet het staafje gewoon een beetje worden ingekort. Om te verlagen, moet aan het inklempunt in de gietijzeren staaf met een vijltje rondom rond wat materiaal worden weggenomen. Bij de konstruktie worden de staafjes overigens klem ingedreven in de gietijzeren drager, maar het iets verder indraaien ervan leidt onherroepelijk tot een breuk. Het grote risiko is eigenlijk steeds dat de staafjes gemakkelijk afbreken, want aan het inklempunt zijn ze erg dun (ca.1.6mm). Ze zijn bovendien vervaardigd uit gehard staal en dat is van nature uit erg broos. Overigens is de speelgoedpiano nooit helemaal 'goed' te stemmen, en dit vanwege de extreme inharmoniciteit van het voortgebrachte spektrum. [1]
Op het eerste gezicht is het wel wat belachelijk om een automatische speelgoedpiano te bouwen, immers niet alleen kruipt er toch bijzonder veel tijd in de bouw en het ontwerp, maar ook zijn de kosten van zo'n automaat heel snel zowat het honderdvoudige van de kost van een nieuwe speelgoedpiano op zich... Maar, niet alleen bestaat er wel behoorlijk wat eigentijdse literatuur voor het instrumentje, er zijn zelfs solisten die er het grootste deel van hun pianistieke karriere aan gewijd hebben, zoals bvb. de onvolprezen Margareth Leng Tan. John Cage schreef reeds in 1948 zijn 'Suite for toy piano'. George Crumb gebruikt het instrument in 'Ancient voices of Children' uit 1970 en ook Mauricio Kagel, John White, Christopher Hobbs, Karlheinz Essl, Hugh Shrapnel schreven er muziek voor. Vanuit dat perspektief biedt ons automaatje wel degelijk perspektieven, niet in het minst omdat het nu mogelijk wordt om aan de kreupele en praktisch voor normale handen onspeelbaar kleine toetsen en de gebrekkige onbetrouwbare mechaniek helemaal te ontsnappen. Dankzij de automaat is het nu immers mogelijk de speelgoedpiano menselijk te bespelen middels een gewoon aanslaggevoelig klavier! Dat komputerbesturing ook mogelijk is ligt daarbij natuurlijk voor de hand. Hierbij kunnen trouwens de meest onwaarschijnlijke klanken aan het instrument worden ontlokt. Zo is het bijvoorbeeld mogelijk kontinu aangehouden tonen te spelen, door de repetitie van de noten op te drijven tot 64 en meer aanslagen per sekonde. Uiteraard kan dit uitsluitend wanneer heel kleine velocity waarden worden gebruikt.
Construction Diary:
 This
soundboard ought to be suspended elastically in the main chassis. We could
use either strong helical springs or rubber mounts. At least, that is the
first experiment to be performed. In a 'normal' toy piano the rod bar is screwed
tightly either on the soundboard (if one is present) or on at least one of
the case panels.


 It can clearly be seen on the picture, sticking out. Tests and adjustment
of the beaters and the rods. Slight corrections of the tuning.
| (Terug) naar logos-projekten: | Terug naar Logos' index-pagina: | Naar Godfried-Willem Raes personal homepage... | Naar katalogus instrumenten |  |
Composers manual |
Last update: 2023-09-17 by Godfried-Willem Raes
Technical drawings and component data sheets:
Firmware specifications and mapping.
PC-board: designed by Johannes Taelman, version rev.2, march 2007. Production: Europrint, with soldermask. gold plated finish.
Power supply: Original designed to use a Sunpower, 100-240V, 47-63Hz AC input,
24V DC / 2.5A output. (adjustable). Removed on 11.08.2008 because of the very
bad behaviour under switching load circumstances. Replaced with XP power supply,
SDR series, type SDR250AS24. (Peak output current: 25A, continuous without cooling:
5.63A, cooled with fan: 10.42A) (website: http://www.xppower.com). Farnell order
number:1436100.
Solenoids: Lucas Ledex STA 13x27 Tubular Push types 195223-2-34. Gelijkstroomweerstand:37.4
Ohm. Uitvoering met 60 graden anker, vrij roterend. Diameter:13mm, bouwhoogte:
27mm. Gatmaat voor de bevestiging: 10mm. Schroefdraad: M10 x 0.75. Toelaatbare
bedrijfsspanning bij 100% duty cyle: 12.2V - kracht: 0.27-0.58N, bij 50% duty
cycle: 17.3V - kracht: 0.62-1,11N, bij 25% duty cycle: 24V, kracht: 1.38 - 2.14N,
en bij 10% duty cycle 39V, kracht 3.07 - 4.18N. ( prijs in 2004: 32$ per stuk,
ca. 12€ per stuk in grotere aantallen). Te bestellen bij Saia-Burgess Benelux
(Mechelse Steenweg 277, 1800 Vilvoorde)

Detailed schematic for the PIC microcontroller boards:

Wieltjes: vastgezet met splitpennen, diameter 1.6 mm. Het gat in de wielas is geboord op 2 mm diameter.
LED's: Yellow: TLCY5100, 5 mm, 9 degrees. Farnell order code:491-2470
Berekening en herstelling van de klankstaafjes:
In dit ontwerp gingen we uit van een bestaand speelgoed instrumentje. Daarbij kan het gebeuren -en die kans is zelfs vrij groot- dat we in de loop van het bouwproces een staafje breken. Omdat die taps lopen naar de vierkantige inklemstaaf toe, is de fragiliteit erg groot. De diameter van de staafjes is op die plaats immers gereduceerd tot minder dan anderhalve millimeter. Daarom moeten we ook in staat zijn het mechanisme zelf te herstellen en waar nodig, nieuwe staafjes te monteren. Aangezien de formule voor de grondtoon van een staaf ingeklemd aan een uiteinde f = (0.5596 / L^2) SQR(Q.k^2 / rho) is, kunnen we alle materiaal en vormkonstanten reduceren tot een enkele konstante die te bepalen is aan de hand van een gegeven staafje waarvan we juist de trillende lengte moeten meten en de toonhoogte. Voor een gegeven speelpiano'tje maten we zo voor de noot Mi (midi 76, frekwentie 659Hz), een staaflengte van 227mm. Hieruit volgt de voor dit instrumentje te gebruiken materiaal-konstante als het produkt f x L^2 , in dit geval dus 33.96. Andere staafjes kunnen nu berekend worden uit L^2 = 33.96 / f. Het staafje voor de noot Fa (midi 77, frekwentie 698Hz) wordt dan 220mm lang. Het overeenkomstige staafje in het werkelijke instrumentje bleek na opmeting 218.6mm lang te zijn, een resultaat dat dus binnen de meetfoutenmarge valt. De moeilijkheid bij het vervangen van een afgebroken staafje bestaat erin eerst en vooral een stukje hard staal te vinden van de juiste diameter. We hebben zelf pogingen gedaan om bij gebrek aan vervangmateriaal inox AISI316 lasstaaf te gebruiken (diameter 3.2mm), wat op zich goed klinkt maar toch veel minder resoneert dan het originele materiaal. De tweede lastige karwei bestaat in het verwijderen van het afgebroken uiteinde in het gietijzeren draagstuk. Uitboren is erg moeilijk omdat het staafmateriaal harder is dan het gietijzer, waardoor de boor steeds wegslipt. Uitkloppen met een scherpe drevel levert in onze ervaring nog het zekerste rezultaat. Bij het inkloppen van het nieuwe staafje moet het uiteinde wat konisch worden geslepen of gedraaid op de draaibank. Inschroeven kan ook (met een losse boorkop vasthouden) maar dan moet het tapse uiteinde van enkele gangen schroefdraad worden voorzien. Gebruik daarbij alleen de grofste voortap-plaat. Het is uiteraard ook goed mogelijk de gehele staafjes konstruktie zelf te bouwen. Het ingeklemd deel moet dan met een scherpe platte beitel van enkele diepe inslagen voorzien worden. De staafjes worden dan vanuit de vlakke kant ingebracht en met de hamer aan het uiteinde ingedreven. De gietijzeren balk moet heel stevig in een zware bankschroef worden vastgezet bij deze operatie. Onderstaande schets toont de konstruktie.

Bij het vervangen van staafjes bevelen we aan het nieuwe staafje steeds iets te lang te dimensioneren. De toon kan immers steeds verhoogd worden door het staafje (goed ingeklemd!) wat af te slijpen. In theorie kan de toon ook verlaagd worden door aan het taps lopend deel wat materiaal weg te nemen. Praktisch werkt dit echter niet, omdat de hele boventoonstruktuur van het klinkende staafje dan gaat verschuiven: de grondtoon verlaagt meer dan de boventonen, die uiteindelijk de toonhoogte bepalen zoals we die horen.
Aangezien we ons verplicht zagen heel regelmatig staafjes die afgebroken waren
door materiaalmoeheid te vervangen, vervingen we alle originele staafjes door
nieuw gemaakte met een diameter van 4 mm en zonder verjonging aan het ingeklemde
uiteinde. Dit maakt de klank iets minder brilliant, maar de grotere duurzaamheid
is nu wel een bonus.
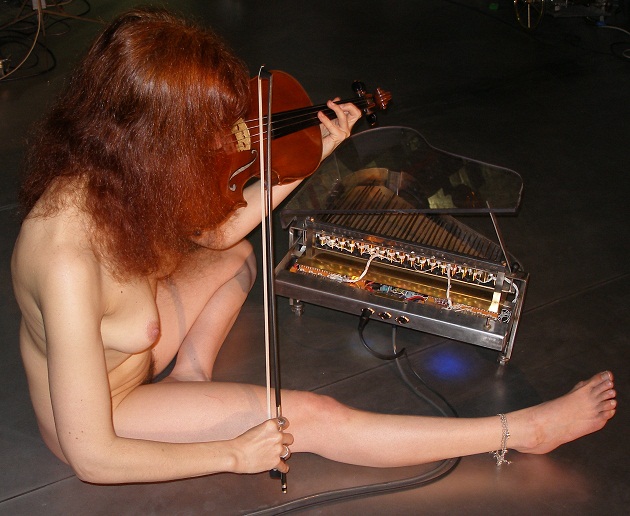
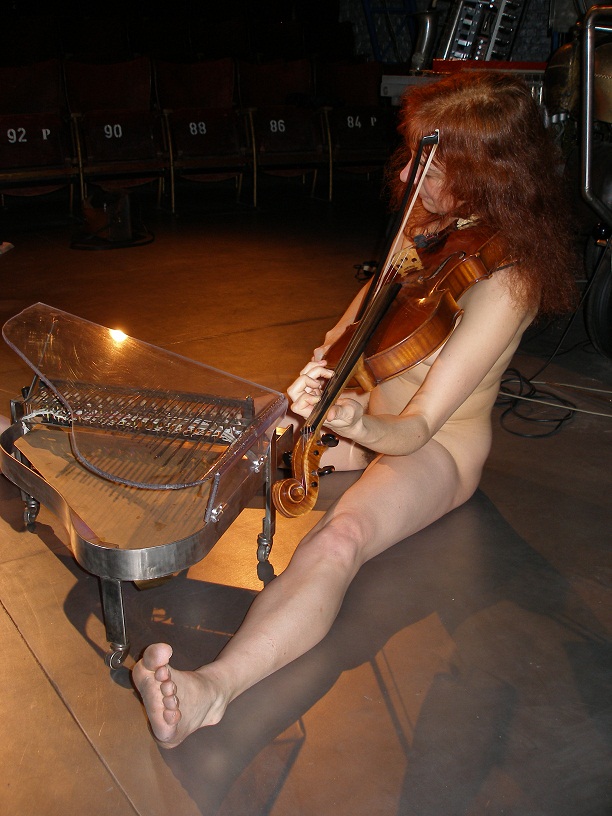
Robody pictures with <Toypi>:
performer: Dominica Eyckmans


pictures by Godfried-Willem Raes, 2009
References:
[1] The formula is taken from Harry F.Olson "Music, Physics and Engineering", 2nd edition, ed. Dover Inc, NY 1967, pages76 and 77. The constant k as mentioned in our text above can be calculated as 0.5596 *( (Q*(a^2)/4)/ Rho)^0.5. With following definitions: